Revision of Backup Files Quickly and Easily from Mon, 01/10/2011 - 01:31
The revisions let you track differences between multiple versions of a post.
This manual shows one simple method of backing up and restoring your files.
Installation
The application you need to download is Déjà Dup. A few easy ways to do this:
- Opening Add/Remove Applications (in the Main Menu at the bottom-left of the screen), searching for Déjà Dup, and installing it
- Opening the Synaptic Package Manager (located under System → Administration in the Main Menu), searching for the deja-dup package, and installing it
- Opening a terminal and typing in sudo apt-get install deja-dup
Opening the Program
After installation, "Déjà Dup Backup Tool" is located in Main Menu → System Tools.
Configuration
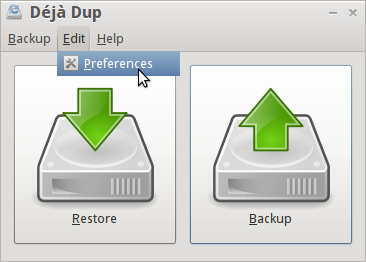
Before making any backups, you should configure the Preferences, which are accessed in the toolbar via Edit → Preferences.

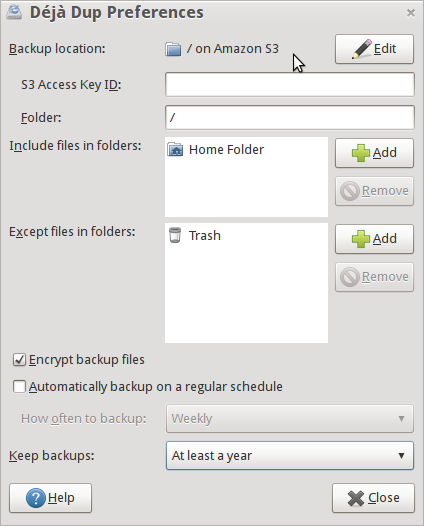
There are multiple settings:
- The backup location (on Amazon's pay-per-use S3 service, on a remote server, on removable media like external hard drives or thumb drives, on a connected server, or on a local folder)
- Which folders to be backed up (by default, it will back up the files in your /home folder except for the Trash directory)
- Whether or not to encrypt your backup files. Enabling encryption is recommended to keep your data safe.
- Whether or not to automatically backup on a schedule (daily, weekly, biweekly, or monthly)
- How long backups should be kept (anywhere from at least once a week to indefinitely)

Backing up
When you are ready to make your backup, simply click on the right-hand Backup button and enter your encryption password if prompted. The first time you run Déjà Dup, you will be asked to choose a backup location and which files to include or exclude. Wait until the process is completed.
Restoring
When you are ready to restore from a backup, simply click on the left-hand Restore button and enter your encryption password if prompted. The first time you run Déjà Dup, you will be asked to choose a backup location. Then choose which backup date to restore from and where to put the restored files. You can either restore them to their original locations or put them in a folder of your choice.
After clicking Forward, you can review your restore options, then click Restore to start the restore.

