Revision of How to Create a LiveUSB from Mon, 08/06/2018 - 22:19
The revisions let you track differences between multiple versions of a post.
The goal of this manual is to instruct the user on how to make a bootable USB drive with Trisquel installed.
Described methods
- Trisquel GNU/Linux (GUI: graphical user interface)
- GNU/Linux (terminal)
- GNU/Linux (UEFI-only)
- Windows (GUI)
- Mac OS X (terminal)
Note: It is possible to enlarge the images via the button right click of your mouse.
Trisquel (Graphical)
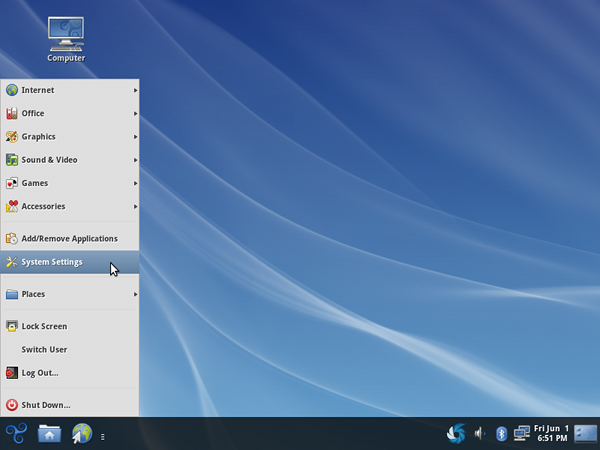
Launch System Settings from the main menu.
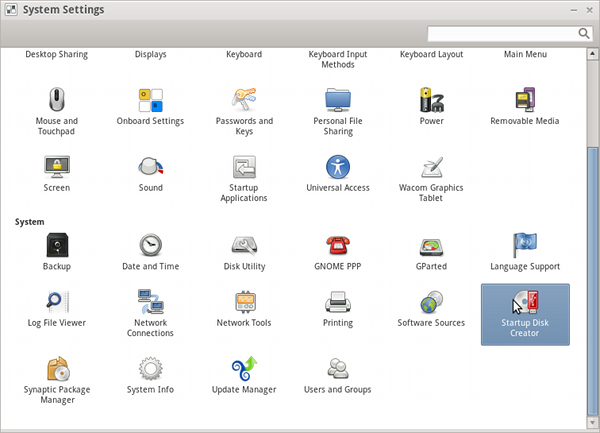
Select Startup Disk Creator.
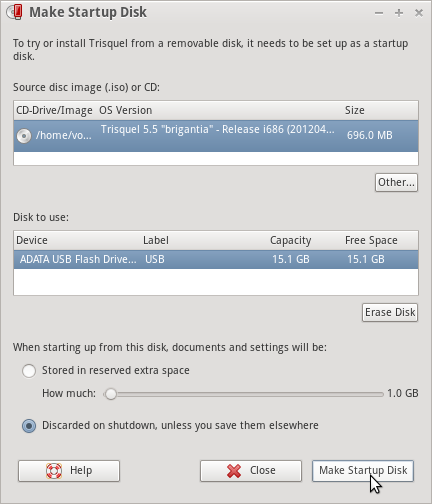
Select a source disk image or burned Trisquel disk and a designated device. Click Make Startup Disk.
Confirmation will display that the startup drive is complete.

Terminal (dd of GNU Coreutils)
To find out the device name, type in terminal:
$ lsblkThen unmount the USB:
$ umount /dev/sdX* (e.g. /dev/sdc*) # use asterisk (known as 'wildcard') to unmount all partitions on the USBThen write and transfer the image to the USB:
$ sudo dd if=/path/to/image.iso of=/dev/sdX bs=8M;syncNote that you want the device name (e.g. /dev/sdX) not the partition name (e.g. /dev/sdX1).
UEFI-only USB (7zip in GNU/Linux)
Sometimes, a machine can only boot a UEFI-only USB. Here's how this can be done:
Format the USB using gparted as fat32, with only one partition. Install p7zip. In terminal:
$ 7z x trisquel-amd64.iso -o/media/$USER/604A-00EA/Where 604A-00EA is the name of the USB drive.
(Adapted from https://askubuntu.com/questions/395879/how-to-create-uefi-only-bootable-usb-live-media)
Windows (Universal USB Installer (GPLv2))
This manual is not an endorsement for the use of non-free operating systems. This manual is designed to help users migrate from non-free systems to free ones, as it is the case of Trisquel.The easiest way to get up an running with USB is to use the USB installer provided by pendrivelinux.com. You’ll need to download and install and follow the instructions.
- Insert a USB stick with at least 2GB of free space.
- Download Pen Drive Linux's USB Installer.
- Select Trisquel from the dropdown list.
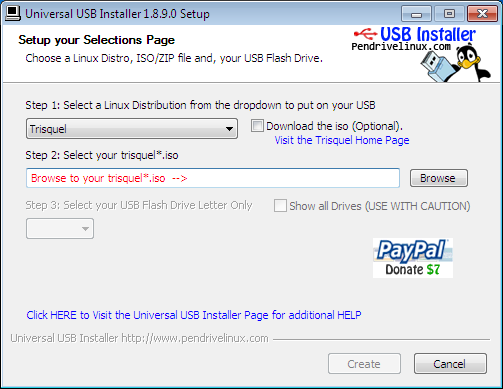
Click 'Browse' and open the downloaded ISO file.
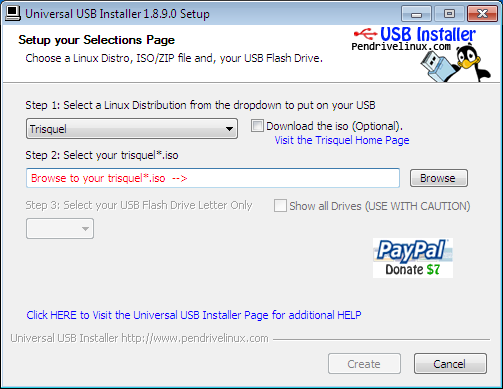

Choose the USB drive and click 'Create'.
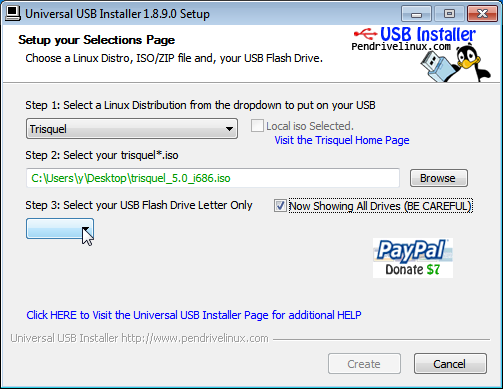
In Mac OS X (Terminal)
This manual is not an endorsement for the use of non-free operating systems. This manual is designed to help users migrate from non-free systems to free ones, as it is the case of Trisquel.- Download a Trisquel disc image from our download page.
- Open the Terminal from Applications/Utilities.
- Convert the .iso file to a .img.
Type (according the name of the path to the file):
$ hdiutil convert -format UDRW -o ~/path/to/trisquel.img ~/path/to/trisquel.isoThis will create a file with a .img.dmg extension. Type the following to rename this file.
$ mv ~/path/to/trisquel.img.dmg ~/path/to/trisquel.imgTo display the list of devices currently attached type:
$ diskutil listInsert your USB stick with at least 2GB of free space, then type:
$ diskutil listagain to figure out the device file assigned to your USB stick (e.g. "/dev/disk2").
Now type:
$ diskutil unmountDisk /dev/diskNwhere N is the number from the last command (If your USB stick is "/dev/disk2", N would be 2).
Then type:
$ sudo dd if=/path/to/trisquel.img of=/dev/rdiskN bs=1mIf you see the error message "dd: Invalid number '1m'", replace "1m" with "1M" in the previous command. To finish:
$ diskutil eject /dev/diskN

