Install Trisquel
Introduction
The goal of this page of the documentation is to show you the steps on how to install Trisquel GNU/Linux, the free operating system of our choice, and the community that is represented by https://trisquel.info. The installation of Trisquel GNU/Linux on a laptop or PC is also described as step 7 of the Freedom Ladder, a campaign of the Free Software Foundation. This Wiki is mostly targeted at beginners, who are first getting in touch with installing a distribution of GNU/Linux or had never installed an operating system before. The steps have been complemented with screenshots for better understanding. Veterans can get a full overview of a common installation and the ability to share it with everybody interested. For a printer-friendly version see the link at the bottom of this page, like within any other documentation.
This documentation covers the installation of the standard edition of Trisquel.
If you don't want to download an ISO image by yourself, ThinkPenguin sells USB flash drives with installation support. Visit the product page at their shop.
Preparation
System Requirements
Before installing Trisquel you should take a look at the system requirements. There is already separate manual about this topic.
Follow the documentation here: System Requirements
Download Trisquel
There is already a separate manual about how to select the right edition of Trisquel and about how to download your preferred Trisquel image.
Follow the documentation here: Download Trisquel
Create Boot Media
If you got your own Trisquel image, create a bootable USB device or burn it on a DVD/CD. The size of this image depends on the edition you have chosen. To be sure, visit the Trisquel Download Page.
Backup Your Data (Important!)
Backup your data - at least your user data - before installing an operating system! There is no warranty if you lose your data by installing Trisquel! Consult the documentation if you are unsure about it.
Boot Your Media
Boot the laptop or PC you would like to install Trisquel on, along with the media that contains your Trisquel image.
To boot from custom boot media, you have to switch or reboot your computer and select the media you had inserted. This process greatly depends on your machine. Pressing [ESC] or [F12] on your keyboard are common ways to open a BIOS menu where you can select exactly which media to boot. If you are not sure about how to get to this prompt, read the manual of your computer or just try it by yourself.
This step only affects the current boot process if you do it right - therefore, changing the boot media doesn't have to affect any further session.
Starting The Installation
Choosing A Language
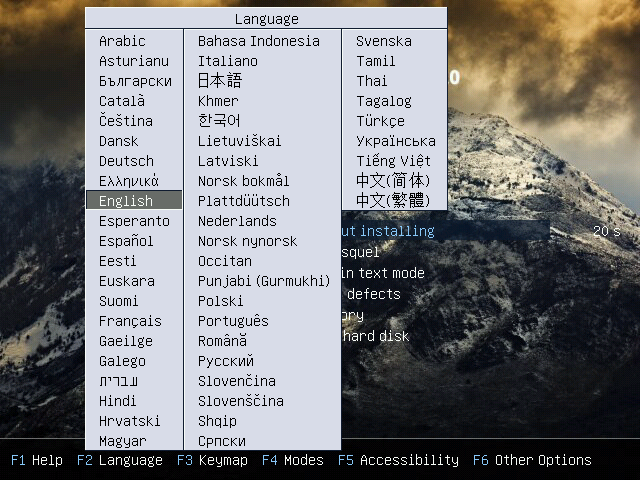
The first screen after booting your image is the following, where you are prompted to select your preferred language. Use your keyboard to select one by using the arrow keys and press [ENTER] to confirm a selection.
Selecting The Install Method
To start the installation, choose "Install Trisquel". To select and confirm your choice use your keyboard as described in the previous step.

It is also possible to select "Try Trisquel without installing". This will take you to a live-system with a full desktop. You will be able to install Trisquel over there by starting the live installer on the desktop. Start it by double-clicking on the Trisquel - icon which is labeled with "Install Trisquel [Version]".
The Installation Process
Welcome
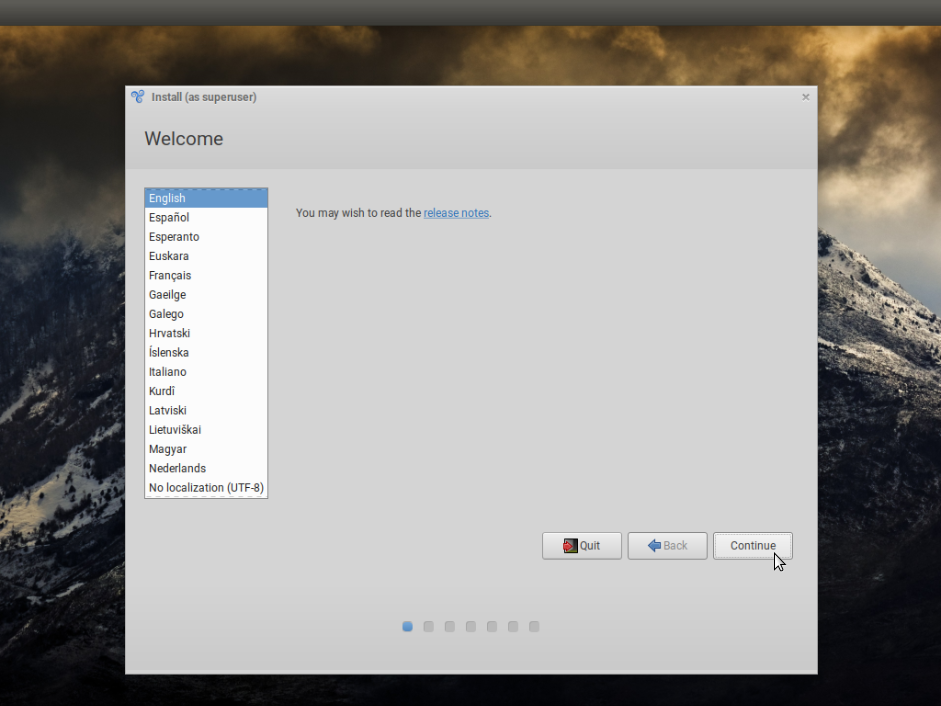
The first screen lets you select the language of the installer.
Keyboard Layout
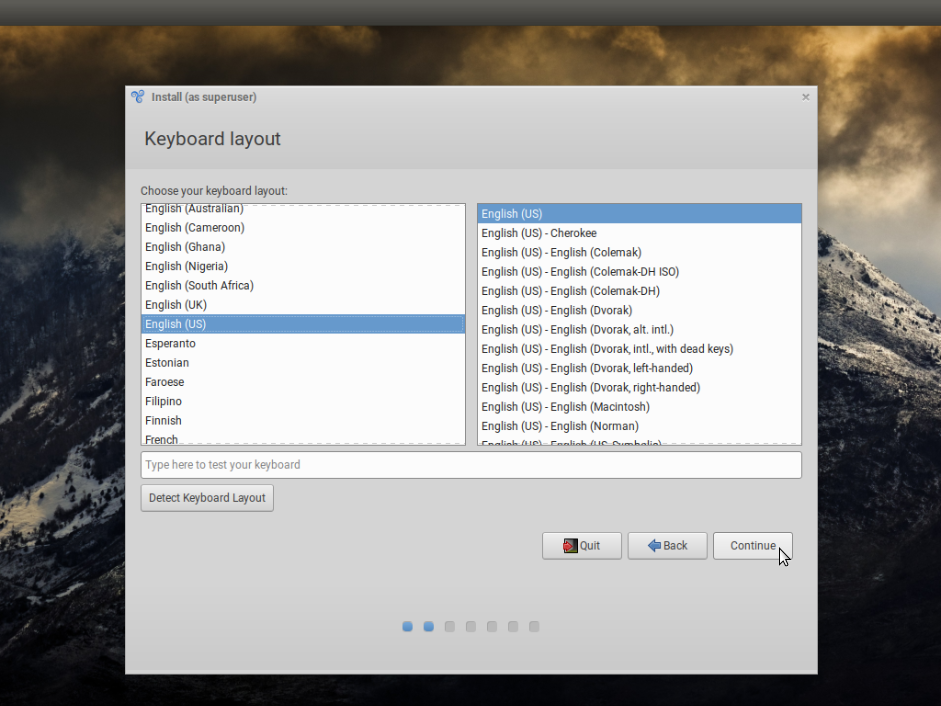
This screen lets you select, detect and test your preferred keyboard layout.
Updates And Other Software
Most users probably want to accept the pre - configuration of this option. If you aren't connected to the internet you can deselect this option. It is also possible to update the system after installation.

Installation Type
With the following screen(s) you can manage how to use the space on the disk and on which disk to install Trisquel on. [BEWARE!] If you make the wrong choice, data loss is possible! So choose wisely! In a perfect world you would have already backed up your data as described before in this documentation. You have been warned!
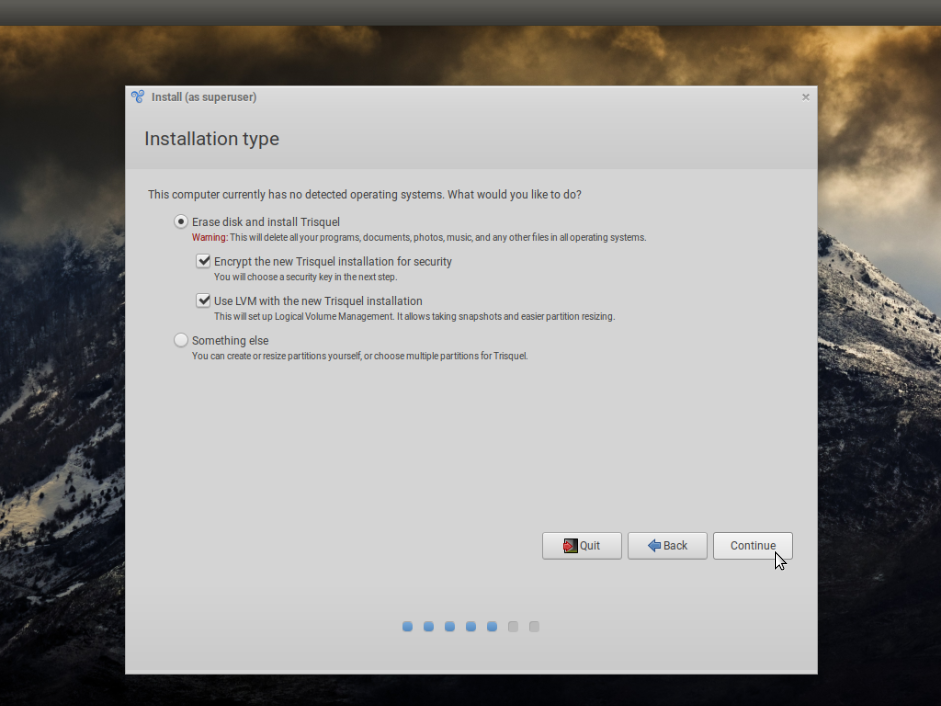
In this case, no other operating systems were detected and only one disk is available - we will use this disk for Trisquel.
Choose A Security Key
As we had wanted to encrypt the installation as shown in the step before, we will now have to choose a security key for it. Choose a strong key/password for more security! Enabling a recovery key is possible but not necessary. Overwriting an empty disk space for security reasons is possible as well!

Where Are You?
With this step you can choose your location.

Who Are You?
In this step you can choose your name(which can be your full name, but any string is possible), your computer's name (which can be anything), your user name (which is necessary to login into your system) and your password (which is also necessary to login after the installation).

Installation
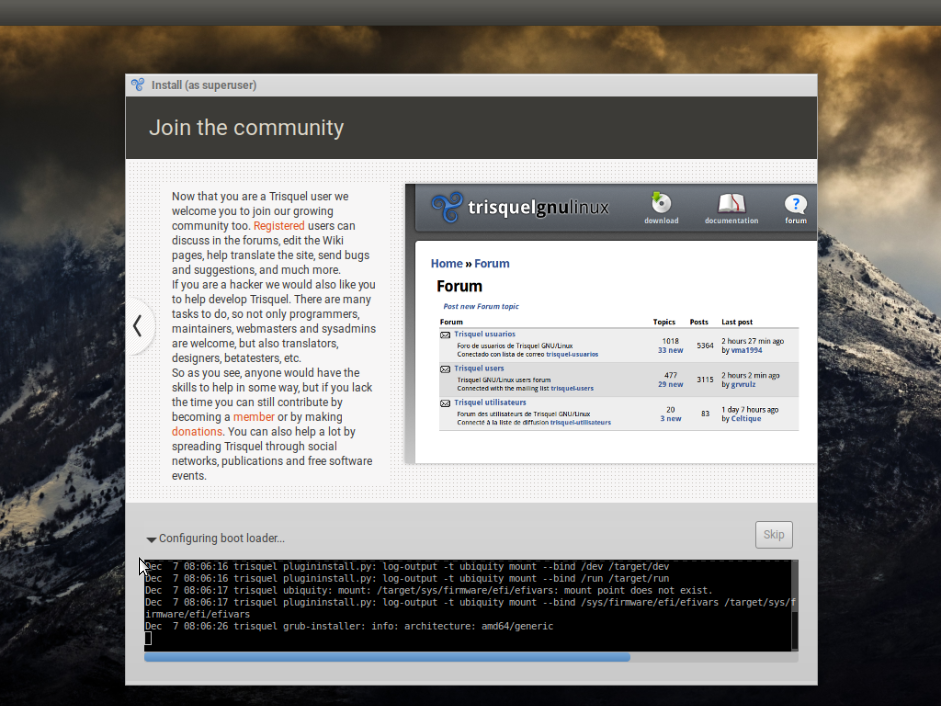
Now, that Trisquel knows everything necessary for the installation, it will copy files, then install and configure packages and finally manage everything else that is needed. Enjoy the slide show and read up on some interesting content while waiting!
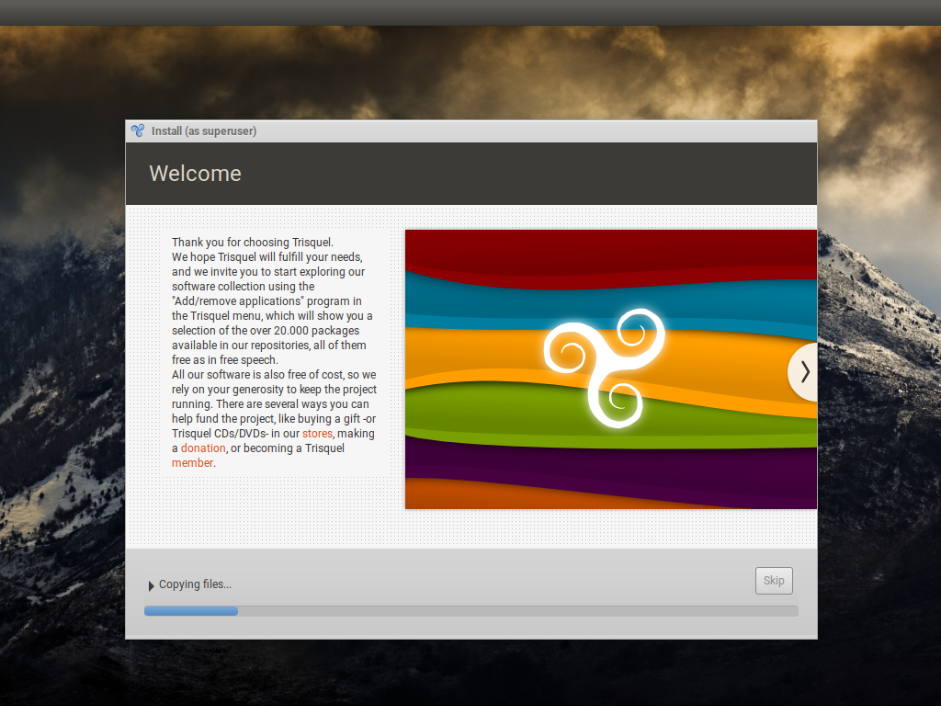

Note: It is possible to get a detailed output of the current operation by clicking on the arrow on the left side of the short description of the current process, like shown within the next screenshot.
Installation Complete
After the installation is completed the following window shows up. Hooray! Click on "Restart Now" to boot into your new Trisquel GNU/Linux system!

| Attachment | Size |
|---|---|
| installing-trisquel-01.png | 171.17 KB |
| installing-trisquel-02.png | 338.89 KB |
| installing-trisquel-03.png | 368.84 KB |
| installing-trisquel-04.png | 437.04 KB |
| installing-trisquel-05.png | 354.83 KB |
| installing-trisquel-06.png | 396.46 KB |
| installing-trisquel-07.png | 453.71 KB |
| installing-trisquel-08.png | 457.69 KB |
| installing-trisquel-09.png | 377.46 KB |
| installing-trisquel-10.png | 522.49 KB |
| installing-trisquel-11.png | 566.29 KB |
| installing-trisquel-12.png | 565.46 KB |
| installing-trisquel-13.png | 876.33 KB |

