

Install Trisquel with Windows in dual-boot
Installing Trisquel side-by-side with Windows on one harddisk
This manual is not an endorsement for the use of non-free operating systems. This manual is designed to help users migrate from non-free systems to free ones.The installation process for a dual-boot system is pretty identical to the standard installation. The machine used here as example had Windows XP installed but in general this installation will not be different if you have Vista or Windows 7 installed. Make sure that you create a backup of all important files on your system. Installing Trisquel could screw up your Windows installation. So it is good to have a working backup of the OS or at least the important files. It is also quite handy if you know how to recover your Windows MBR in case the Trisquel screws up the bootloader installation. Guides how to do this via the recovery console integrated in the Windows installation CD are available all over the web. Simply search for "windows fix mbr" and you will find tons of guides.
As soon as the Trisquel installer detects an available Windows partition you will be given the option to install Trisquel alongside with the existing Microsoft operating system. Leave the default option unless you want to remove Windows from your harddisk.
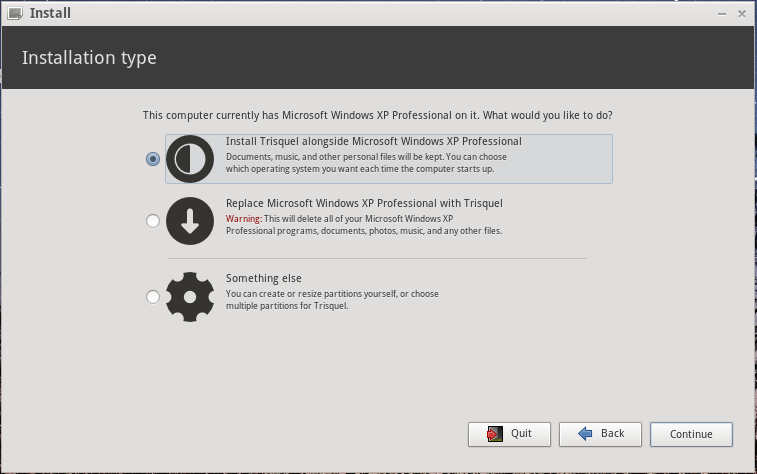
IMPORTANT: If you do not see the option "Install Trisquel Alongside Windows [version]", DO NOT ATTEMPT INSTALLATION. Instead, use the following steps:
- Reboot your system into Windows.
- Defragment your hard drive.
- Go to Disk Management to edit the hard disk partitions. On Windows XP, click Start, type Run, type compmgmt.msc, and click OK. On Windows Vista and Windows 7, search the Control Panel for Disk Management.
- Once you have Disk Management open, right-click on the span with the largest number as its size (on your C:/ drive) and select "Shrink Volume". Shrink the volume by all the available space, and reboot.
If you still do not see the option, the likely cause is that you have too many logical partitions on your hard drive. Your computer will likely have a "Recovery" disk placed there by the manufacturer. Find and follow the instructions to delete this partition for your computer model.
At this point, reboot into the installer.
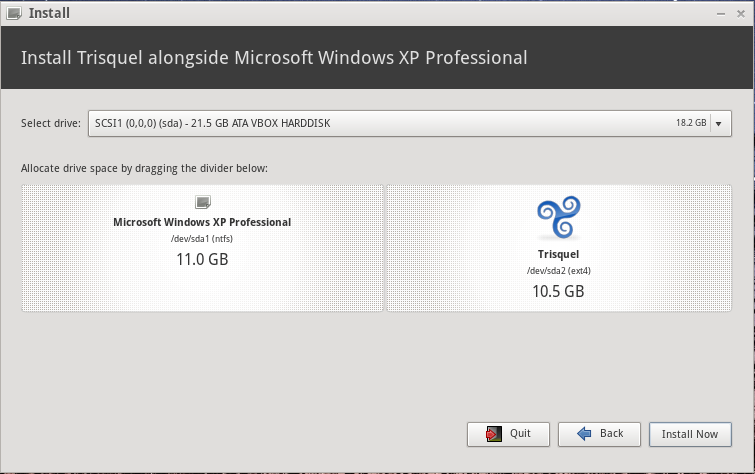
The Trisquel installer will now show how much disk space is going to be allocated for Trisquel. You can adjust the size of the Trisquel partition as needed. In general, it is important you have enough space available on your Windows partition. If not, then delete un-needed files from it. Secondly the Windows drive might need to be defragged prior installation of Trisquel. This is caused by file being written in a distributed manor over the Windows partition. Depending on how much you save and delete files in your Windows installation, there might be fragments of existing files which allocate blocks at the very end of the Windows partition even if there are several GB freely available in between. If you are unable to resize your Windows partition to the size you want, consider deleting files followed by defragging your harddisk within Windows. Resizing both partitions can be easily done by dragging the vertical line in between the partition layout with your mouse. 10-20GB should be the minimum partition size for installing Trisquel. This is of course depending on the amount of programs you wish to install afterwards.
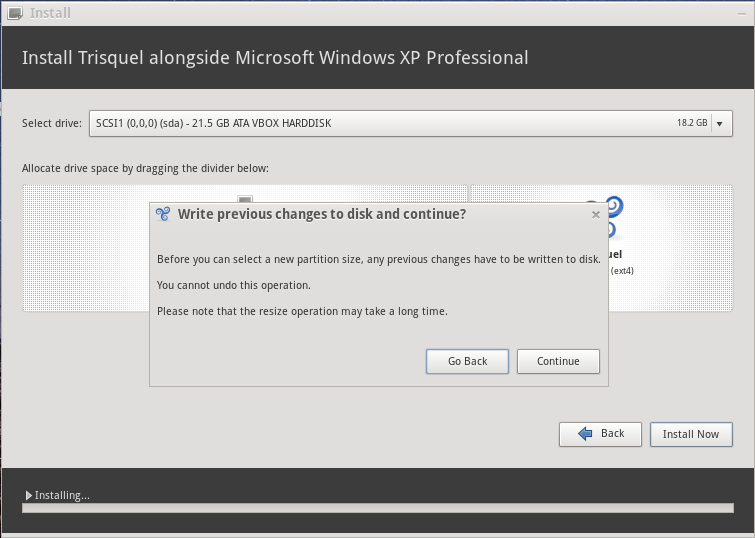
Trisquel will then show the message box below which you have to confirm. Be aware that after clicking on "Continue" here physical changes will be done to your harddrive. Depending on your system (HDD speed, CPU, motherboard) resizing the Windows partition can quite take a while.
After successful resizing of the Windows partition and generation of the Trisquel partition the Trisquel installer will ask your if you wish to install any user-related information from your Windows partition. This includes your user as well as your documents and certain settings within Windows. For a clean Trisquel installation leave the box unchecked.

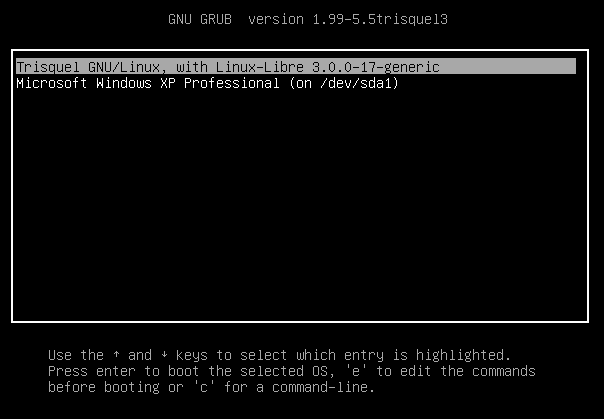
If everything worked fine the system will reboot after you configured the standard settings (User, password, timezone, etc) and show up a boot menu where you can both select Trisquel and Windows. If you wish to set Windows as the primary OS, you need to consider the man pages and howto's related to GRUB2 configuration how to achieve this.
After logging into Trisquel with the configured user, you will notice that the Windows partition is visible and will be mounted as soon as you click on it. Depending on your use case this might be fine or not. I you like to exchange files with your Windows partition back and forth, this behavior might be acceptable.
If you want to automount the Windows partition you will need to adjust your /etc/fstab.
Simply add a line like this:
/dev/sda1 /opt/windrive ntfs-3g rw 0 0Of course you will need to generate /opt/windrive and change the ownership for your user prior rebooting your system. For this you simply need to launch a terminal.
First, we generate the target directory where we mount the Windows partition:
sudo mkdir /opt/windriveSecond, we change the ownership of the target directory:
sudo chown <your-user>:<your-user> /opt/windriveOf course you will need to substitute <your-user> with your true username.
After reboot (or reloading all mount points in /etc/fstab via sudo mount -a) the Windows partition will not be visible anymore inside the file manager. Instead it will be mounted under /opt/windrive. In case your fear the integrity of your Windows drive, you might even want to mount it as read-only system. Simply change the option rw in the fstab example above to ro.
The line in the fstab would then look like this:/dev/sda1 /opt/windrive ntfs-3g ro 0 0